
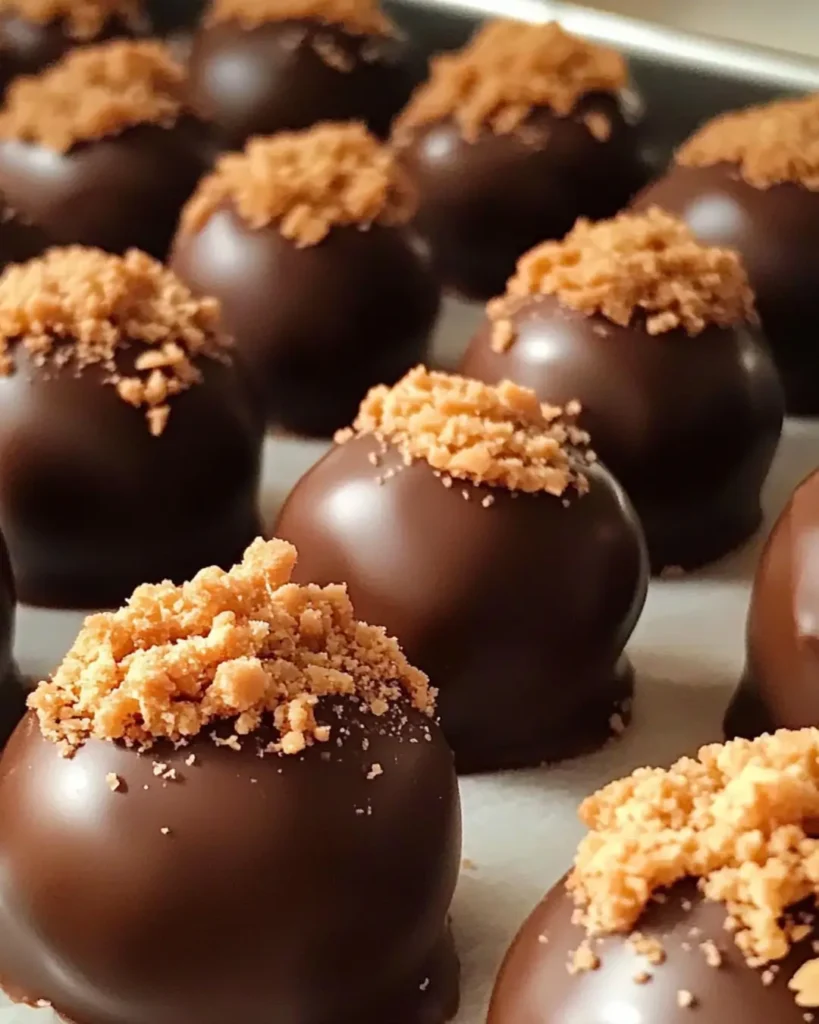
Butterfinger Peanut Butter Truffles – A Perfect No-Bake Treat!
Butterfinger Peanut Butter Truffles are the ultimate bite-sized indulgence! Indeed, with a creamy peanut butter filling, crunchy Butterfinger bits, and a rich chocolate coating, these no-bake truffles are an irresistible treat for peanut butter and chocolate lovers alike. Whether you’re making them for a party, a holiday gift, or simply just a sweet snack, these truffles are easy to prepare and require only a handful of ingredients.
Why You’ll Love These Butterfinger Truffles
✅ No-Bake & Easy: No need to turn on the oven! These truffles come together quickly.
✅ Rich & Creamy: The peanut butter and Butterfinger blend creates a melt-in-your-mouth texture.
✅ Perfect for Any Occasion: Whether it’s for holidays, parties, or just a sweet craving, these truffles are a hit!
✅ Make-Ahead Friendly: Plus, store them in the fridge or freezer for an anytime treat.
Ingredients You’ll Need For the Butterfinger Peanut Butter Truffles
For the Truffles:
- 2 cups crushed Butterfinger candy bars (about 4-6 full-size bars)
- 1 cup creamy peanut butter
- 2 cups powdered sugar
- ½ cup unsalted butter, softened
- 1 teaspoon vanilla extract
For the Chocolate Coating:
- 2 cups semisweet chocolate chips
- 1 tablespoon vegetable shortening or coconut oil (optional, for a smoother coating)
How to Make Butterfinger Peanut Butter Truffles
1️⃣ Crush the Butterfingers
- Place the Butterfinger candy bars in a resealable plastic bag and crush them using a rolling pin.
- For a finer texture, pulse them in a food processor.
- Set aside a few tablespoons of crushed Butterfingers for garnish.
2️⃣ Prepare the Peanut Butter Mixture
- In a large mixing bowl, combine creamy peanut butter, softened butter, powdered sugar, and vanilla extract.
- Mix well until smooth and dough-like.
3️⃣ Incorporate the Butterfinger Crumbs
- Fold in the crushed Butterfinger candy bars, making sure the mixture is well combined.
4️⃣ Shape the Butterfinger Truffles
- Roll the mixture into small, bite-sized balls (about 1 inch in diameter).
- Place them on a parchment-lined baking sheet.
- Refrigerate for at least 30 minutes until firm.
5️⃣ Melt the Chocolate
- In a microwave-safe bowl, melt the chocolate chips and vegetable shortening (if using) in 30-second intervals, stirring between each, until smooth.
- Alternatively, melt the chocolate using a double boiler.
6️⃣ Coat the Truffles
- Using a fork or dipping tool, dip each peanut butter ball into the melted chocolate, ensuring it’s fully coated.
- Let excess chocolate drip off before placing them back on the parchment paper.
- Sprinkle with reserved Butterfinger crumbs before the chocolate sets.
7️⃣ Let Them Set & Enjoy Your Peanut Butter Truffles!
- Allow the truffles to sit at room temperature until the chocolate firms up.
- For faster setting, refrigerate for 15-20 minutes.
Tips for the Best Butterfinger Peanut Butter Truffles
✔ Use a Cookie Scoop: This helps ensure uniform truffle sizes.
✔ Chill Before Dipping: This prevents the truffles from falling apart in the warm chocolate.
✔ Work Quickly with Chocolate: Melted chocolate firms up fast, so dip in small batches.
✔ Try Different Chocolates: For instance, use dark, milk, or white chocolate for variety.
✔ Add a Drizzle: Finally, after coating, drizzle with melted white chocolate for an extra-fancy look.
Variations to Try With The Peanut Butter Candy Truffles
💡 White Chocolate Version: Swap semisweet chocolate for white chocolate for a sweeter twist.
💡 Crunchier Truffles: For added crunch, add crushed pretzels or Rice Krispies.
💡 Salted Caramel Twist: To elevate the flavor, drizzle caramel sauce over the truffles before the chocolate sets.
💡 Nutty Delight: Alternatively, roll in crushed peanuts instead of Butterfinger crumbs for a classic peanut butter-chocolate combo.
How to Store Butterfinger Peanut Butter Truffles
🧊 Refrigerator: Store in an airtight container for up to 1 week.
❄️ Freezer: Freeze for up to 3 months. Let them sit at room temperature for a few minutes before serving.
Frequently Asked Questions (FAQs) About The Peanut Butter Truffles
-
Can I use crunchy peanut butter instead of creamy?
Yes! Crunchy peanut butter will add more texture, but creamy peanut butter gives the truffles a smoother consistency.
-
How do I prevent my truffles from melting too quickly?
Keep them refrigerated until ready to serve. If serving at an outdoor event, place them in a chilled container.
-
What if my chocolate is too thick for dipping?
Add a teaspoon of vegetable shortening or coconut oil to thin it out for a smoother coating.
-
Can I make these truffles ahead of time?
Absolutely! These are perfect for making ahead since they store well in the fridge or freezer.
-
Can I use another candy instead of Butterfingers?
Yes! Try using crushed Reese’s, Snickers, or Heath bars for a fun twist. Alternatively, you could even try other crunchy candies.
Butterfinger Peanut Butter Truffles are a dreamy blend of sweet, salty, creamy, and crunchy—everything you could want in a no-bake dessert! Therefore, try this easy recipe today and share these decadent bites with friends and family.